

Last updated: 23 October 2026
Lies of P is a challenging Soulslike game filled with dangerous puppets, monsters, and human enemies. Each boss has different attacks, and some require you to learn their patterns before you can defeat them. With both main and optional bosses, as well as different endings, many players wonder how many bosses are in the game, what the Lies of P bosses are in order, and which bosses they can skip.
This guide lists the Lies of P bosses in order, their locations, and the main rewards you can earn. It also marks optional bosses so you know which fights you can skip. Let’s take a closer look at each Lies of P boss below.

All Lies of P Bosses: Quick Overview
The table below lists all the bosses in Lies of P in approximate order of appearance. Also mentioning Lies of P boss locations, rewards, and optional encounters, so you can decide which bosses to fight as you progress through the game.
| Boss Name | Location | Optional? | Rewards |
| Parade Master | Krat Central Station | No | Parade Leader’s Ergo, Quartz, 1,852 Ergo |
| Mad Donkey | Krat City Hall area | No | Mad Donkey’s Mask, Mad Donkey’s Hunting Apparel |
| Scrapped Watchman | Krat City Hall Courtyard | No | Overcharged Storage Battery, Broken Hero’s Ergo, Core, Quartz, Small Wooden Officer Puppet, 5,040 Ergo |
| Survivor | Workshop Union Culvert | Yes | Stalker’s Promise gesture, Survivor’s Mask, Survivor’s Hunting Apparel |
| Puppet of the Future | Workshop Union Culvert | Yes | Quartz, Radiant Ergo Chunk |
| King’s Flame, Fuoco | Venigni Works | No | High-Powered Flame Amplifier, King’s Flame Ergo, Flame Grindstone |
| The Atoned | Moonlight Town | Yes | Cable Railway Key, The Atoned’s Mask |
| Fallen Archbishop Andreus | St. Frangelico Cathedral | No | Twisted Angel’s Ergo, 8,778 Ergo |
| Eldest of the Black Rabbit Brotherhood | Malum District | No | Resplendent Ergo Chunk, Taunt gesture |
| White Lady | Rosa Isabelle Street | Yes | The White Lady’s Mask, The White Lady’s Locket |
| Mad Clown Puppet | Rosa Isabelle Street | Yes | Quartz |
| Romeo, King of Puppets | Estella Opera House | No | Burnt-White King’s Ergo, Puppet Prince’s Formal Dress, Someone’s Necklace |
| Champion Victor | Grand Exhibition Gallery | No | Reborn Champion’s Ergo |
| Owl Doctor | Barren Swamp | Yes | Owl Doctor’s Mask |
| Green Monster of the Swamp | Barren Swamp | No | Golden Ergo, Puppet-Devouring Green Hunter’s Ergo |
| Robber Weasel | Krat Central Station Platform | Yes | Robber Weasel’s Mask, Robber Weasel’s Hunting Apparel |
| Walker of Illusions | Collapsed Street | No | Legion Caliber, Dark Moon Moonstone of the Covenant |
| Corrupted Parade Master | Krat Central Station revisit | No | Full Moonstone, Quartz |
| Black Rabbit Brotherhood (Second Fight) | Relic of Trismegistus | No | Quartz |
| Door Guardian | Arche Abbey Entrance | No | High-Level Alchemist Badge |
| Black Cat | Arche Abbey Outer Wall | Yes | Black Cat’s Mask |
| Laxasia the Complete | Arche Abbey | No | Sad Zealot’s Ergo |
| Red Fox | Arche Abbey Upper Area | Yes | Red Fox’s Mask |
| Simon Manus, Awakened God | Arche Abbey | No | Fallen One’s Ergo, Arm of God |
| Nameless Puppet | Under the Abyss | Conditional | Nameless Puppet’s Ergo |
Optional fights and some rewards can depend on dialogue choices and story decisions. Check the descriptions below for important details.
All Lies of P Bosses in Order: Rewards and How to Defeat Each Boss
The base game has 26 commonly listed boss encounters, including main bosses and optional bosses. Of these, 16 are main bosses, and 10 are optional bosses.
1. Parade Master
- Type: Main boss
- Location: Krat Central Station Plaza
- Rewards: Parade Leader’s Ergo, Quartz

The Parade Master is the first major boss in Lies of P. You encounter this large puppet near the beginning of your journey through Krat. It carries a cage on its back and uses heavy punches, stomps, and charging attacks to damage you.
The fight with this boss is in two phases. In the second phase, the Parade Master removes its own head and uses it as a weapon, giving its attacks more reach. This fight teaches you the basics of dodging, blocking, and Perfect Guards.
How to defeat Parade Master in Lies of P: Watch its attack animations and avoid attacking too many times in a row. Use Perfect Guards when you can, or dodge its slower attacks. When its health bar flashes white, use a charged heavy attack to make it vulnerable to a Fatal Attack.
2. Mad Donkey
- Type: Main boss
- Location: Alchemist Bridge, Elysion Boulevard
- Rewards: Mad Donkey’s Mask, Mad Donkey’s Hunting Apparel

Mad Donkey is a human Stalker who attacks Pinocchio and Geppetto. He believes Geppetto is responsible for the puppet uprising and tries to stop them as they cross the bridge.
Unlike the Parade Master, Mad Donkey fights with a weapon and moves quickly at close range. His attacks can deal heavy damage if you remain directly in front of him. This encounter also introduces you to fighting human enemies, who behave differently from large puppets.
How to defeat Mad Donkey in Lies of P: Try to move behind Mad Donkey and use back attacks whenever possible. Perfect Guards can interrupt his attacks and help you build up stagger damage. Avoid trading hits with him, as his weapon can quickly drain your health.
3. Scrapped Watchman
- Type: Main boss
- Location: Krat City Hall Courtyard
- Rewards: Overcharged Storage Battery, Broken Hero’s Ergo, Core, Quartz, Small Wooden Officer Puppet

The Scrapped Watchman is a large police puppet found in the Krat City Hall Courtyard. It uses powerful arm swings, lunges, and ground attacks to keep you at a distance. Its size can make the fight intimidating, but its attacks become easier to handle once you learn their timing.
The second phase introduces electric attacks that can build up the Shock status effect. This makes the fight more dangerous if you continue attacking without paying attention to your health and stamina.
How to defeat Scrapped Watchman in Lies of P: Learn the timing of its slower attacks and use Perfect Guards to build up stagger damage. You can also summon a Specter to help draw its attention while you attack from behind. Carrying items that reduce Shock buildup can make the second phase easier.
4. Survivor (Optional)
- Type: Optional mini-boss
- Location: Workshop Union Culvert
- Rewards: Survivor’s Mask, Survivor’s Hunting Apparel, Stalker’s Promise gesture

Survivor is a human Stalker who fights with a weapon and relies on quick attacks. You encounter him inside the Workshop Union area. Unlike larger Lies of P bosses, he is difficult to stagger with ordinary attacks and can quickly punish you if you get too aggressive.
Defeating Survivor also gives you access to the Stalker’s Promise gesture. This gesture is important because it can help you avoid a later optional fight against The Atoned.
How to defeat Survivor in Lies of P: Try to move behind Survivor and use back attacks. Dodging can be more effective than trying to block every attack, especially while you are still learning his movements. Wait for him to finish a combo before attacking.
5. Puppet of the Future (Optional)
- Type: Optional mini-boss
- Location: Workshop Union Culvert
- Rewards: Radiant Ergo Chunk, Quartz

Puppet of the Future is a huge puppet that patrols a corrosive pool in the Workshop Union area. Its large size and heavy attacks make it look dangerous, but the surrounding liquid is also a major problem. Staying in the corrosive area can cause Decay to build up and drain your health.
You do not need to defeat this boss immediately. If you are struggling, you can return after making the area safer and upgrading your character.
How to defeat it: First, look for a way to reduce the corrosive liquid in the area. Once the ground is safer, attack its legs and move away before it stomps or swings its arms. Do not stay close for too long, as its wide attacks can catch you while you are recovering stamina.
6. King’s Flame, Fuoco
- Type: Main boss
- Location: Venigni Works
- Rewards: High-Powered Flame Amplifier, King’s Flame Ergo, Flame Grindstone

King’s Flame, Fuoco is a large furnace puppet that uses a heavy hammer and powerful fire attacks. It is one of the first major fights where you need to manage both physical damage and elemental status effects.
The first phase mainly focuses on close-range attacks and sweeping strikes. In the second phase, Fuoco releases fire across the arena and uses ranged attacks that can be difficult to avoid if you are standing in the wrong place.
How to defeat it: Fire resistance can help you survive longer. Watch its movements and avoid attacking too many times after each opening. During the second phase, use the large red pillars for cover when Fuoco launches ranged attacks or spreads fire across the ground. Attack again when it finishes a move and has to recover.
7. The Atoned (Optional)
- Type: Optional mini-boss
- Location: Moonlight Town, near the cable railway
- Rewards: The Atoned’s Mask, Cable Railway Key
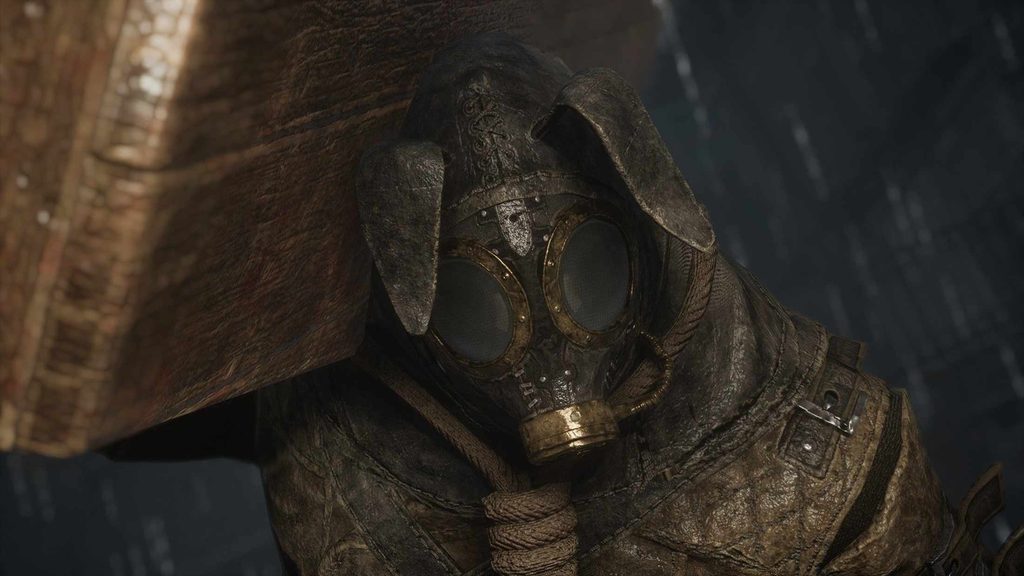
The Atoned is a Stalker who guards the cable railway. You can either fight her or avoid the encounter through a dialogue choice. If you have obtained the Stalker’s Promise gesture from Survivor, you can use it during the conversation to receive the Cable Railway Key without fighting.
If you choose to fight, the Atoned uses quick weapon attacks and can dodge some of your normal swings. Her fighting style is similar to other human Stalkers, so positioning is important.
How to defeat her: Move around her and look for opportunities to attack from behind. Avoid repeatedly using heavy attacks when she is moving, as you may miss and leave yourself open to a counterattack. If you prefer to skip the fight, choose the correct dialogue option and use the gesture.
8. Fallen Archbishop Andreus
- Type: Main boss
- Location: St. Frangelico Cathedral
- Rewards: Twisted Angel’s Ergo
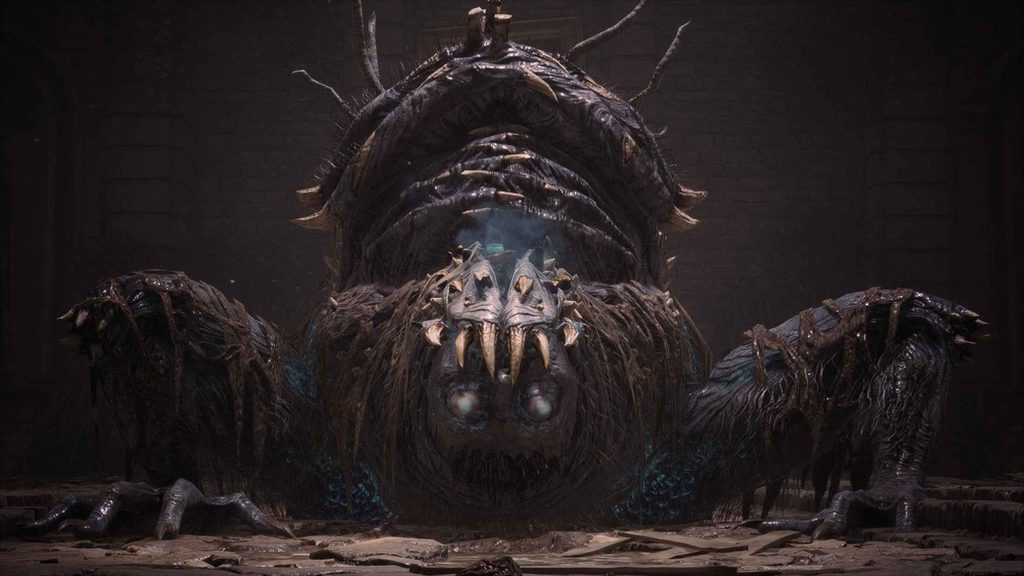
Fallen Archbishop Andreus is a large carcass creature found deep inside St. Frangelico Cathedral. Its twisted body has long-reaching attacks, and the fight becomes more complicated when its second phase begins.
This is a two-phase encounter, making it yet another unique boss in Lies of P. The first phase focuses on the creature’s large body and sweeping attacks. In the second phase, another side of the boss becomes active, forcing you to pay attention to attacks coming from different directions.
How to defeat Fallen Archbishop Andreus in Lies of P: Fire damage is useful against this carcass enemy, so consider using fire-based weapons or consumables. Watch for its long-reaching attacks and avoid staying directly in front of it for too long. If you summon a Specter, use the extra opening to attack from behind while keeping enough stamina to dodge.
9. Eldest of the Black Rabbit Brotherhood
- Type: Main boss
- Location: Malum District
- Rewards: Resplendent Ergo Chunk, Taunt gesture

The Eldest of the Black Rabbit Brotherhood is the main opponent in a fight that also involves the other members of the group. Instead of facing one enemy at a time, you must manage several opponents who enter the battle at different points.
The Eldest uses a large weapon with powerful swings and wide attack ranges. The other members use faster attacks and can distract you while the main boss closes in. This makes the encounter as much about controlling the fight as dealing damage.
How to defeat it: Avoid getting surrounded. Focus on the smaller members when they join the fight, and use openings after their combos to land back attacks. A Specter can help distract enemies, giving you more chances to attack safely. Save stamina for dodging rather than trying to hit every opponent at once.
10. White Lady (Optional)
- Type: Optional mini-boss
- Location: Rosa Isabelle Street
- Rewards: The White Lady’s Mask, The White Lady’s Locket

The White Lady is a human Stalker who uses a sword and quick close-range attacks. You encounter her in Rosa Isabelle Street, where she challenges Pinocchio to a fight.
Unlike large puppet Lies of P bosses, she relies on speed and weapon combinations rather than heavy attacks. She can close the distance quickly, so standing still or attacking repeatedly can leave you open to damage.
How to defeat her: Watch the direction of her sword attacks and dodge when she begins a combo. Try to attack after she finishes a sequence instead of interrupting her moves. If you can get behind her, a back attack can deal significant damage.
11. Mad Clown Puppet (Optional)
- Type: Optional mini-boss
- Location: Rosa Isabelle Street
- Rewards: Quartz

The Mad Clown Puppet is a large puppet that attacks with heavy punches and spinning movements. It can be found while exploring Rosa Isabelle Street and is easy to miss if you move through the area quickly.
Its attacks cover a wide area, and its spinning move can hit you several times if you remain too close. Although it is optional, defeating it can be useful if you want to collect more rewards and gain experience before moving forward.
How to defeat it: Keep some distance when it starts spinning and wait for the move to end before attacking. Perfect Guards can help build up stagger damage, but dodging away from its wider attacks is also a good option. Avoid getting greedy with long attack combinations.
12. Romeo, King of Puppets
- Type: Main boss
- Location: Estella Opera House
- Rewards: Burnt-White King’s Ergo, Puppet Prince’s Formal Dress, Someone’s Necklace
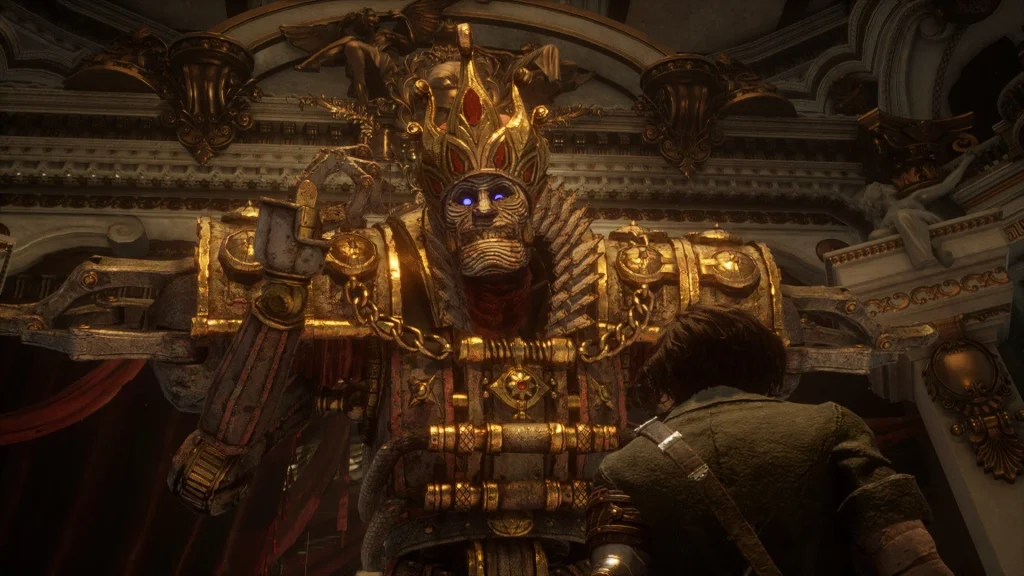
The King of Puppets is a major Lies of P boss with two phases. The first phase involves fighting the large armored puppet, which uses heavy arm swings and wide attacks. After defeating this form, you face Romeo, the King of Puppets, who is much faster and more aggressive.
Romeo uses a scythe and can chain several attacks together. In the second phase, he can also enhance his weapon with fire, making it dangerous to remain close while he attacks.
How to defeat it: During the first phase, focus on learning the boss’s attack timing and attacking after its slower moves. When Romeo appears, save stamina for dodging his long combos. Avoid trying to trade hits with him, and wait for clear openings before using heavy attacks.
13. Champion Victor
- Type: Main boss
- Location: Grand Exhibition Gallery
- Rewards: Reborn Champion’s Ergo

Champion Victor is a powerful human-like creature who relies on heavy punches, charges, and ground attacks. He moves faster than his size suggests and can quickly close the distance if you try to keep away from him.
The fight becomes more intense in the second phase, when Victor uses longer attack combinations and applies more pressure. His attacks can deal significant damage, so blocking or dodging at the wrong time can quickly put you in danger.
How to defeat Champion Victor in Lies of P: Watch his attack combinations and dodge toward a safe opening when he finishes a move. Avoid using too many attacks at once, as you need stamina to defend yourself. If you summon a Specter, use the distraction to attack from behind and build up stagger damage.
14. Owl Doctor (Optional)
- Type: Optional mini-boss
- Location: Barren Swamp
- Rewards: Owl Doctor’s Mask

Owl Doctor is a human enemy wearing an owl mask. You can find him in a small house in the Barren Swamp area. He uses a close-range weapon and attacks quickly, making the fight similar to encounters against other human Stalkers.
His smaller size allows him to move around you and attack before you have time to recover. However, his attacks are easier to manage once you learn his timing.
How to defeat Owl Doctor Boss in Lies of P: Try to move behind Owl Doctor and use back attacks. Dodge his faster attacks instead of attempting to block every hit. Wait for him to finish a combo before attacking, and avoid using heavy attacks while he is moving.
15. Green Monster of the Swamp
- Type: Main boss
- Location: Barren Swamp
- Rewards: Golden Ergo, Puppet-Devouring Green Hunter’s Ergo
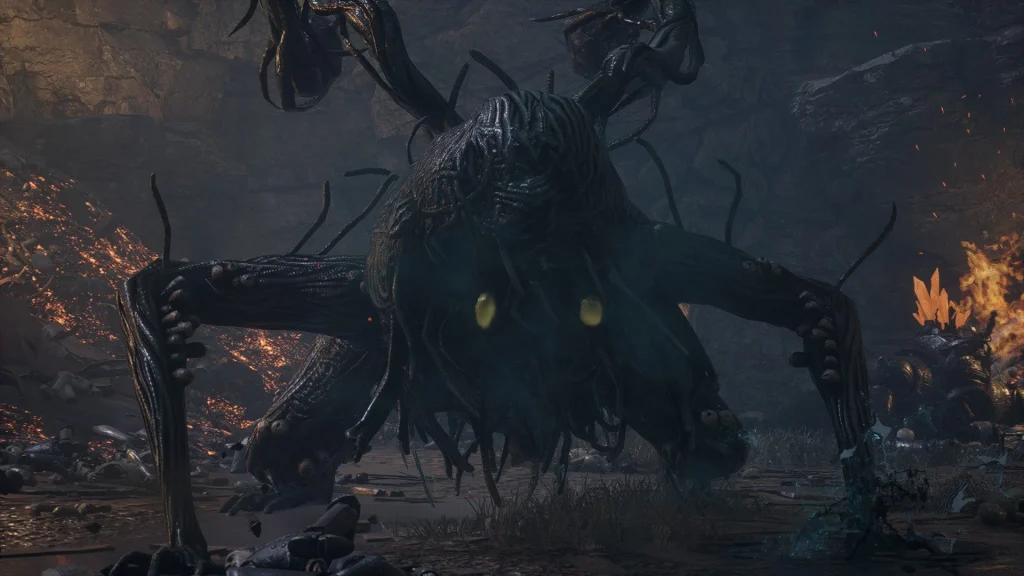
The Green Monster of the Swamp is a large carcass creature that uses long-reaching attacks, lunges, and movements that can quickly close the distance. Its attacks can also build up Decay, which makes it important to manage status effects during the fight.
This encounter has two phases, with the first focusing on the monster’s carcass form. The fight becomes more dangerous as it moves around the arena and uses attacks that can catch you while you are trying to heal or recover stamina.
How to defeat it: Fire damage can help against the carcass form. Carry items that reduce or remove Decay, and avoid standing directly in front of the monster for too long. Learn the timing of its lunges and attack after it finishes a sequence. A Specter can help create openings, but you still need to watch the boss’s movements.
16. Puppet-Devouring Green Monster (Second Phase)
- Type: Main boss, second phase of the Green Monster fight
- Location: Barren Swamp Nest
- Rewards: Puppet-Devouring Green Hunter’s Ergo

The Puppet-Devouring Green Monster is the second phase of the Green Monster encounter. The creature takes over a puppet body, combining carcass attacks with faster puppet-like movements.
Its attacks include lunges, sweeping strikes, and charges across the arena. Because its movements change from the first phase, you cannot rely on the same timing for every attack. This is one of the fights where learning the moves is more useful than simply trying to deal damage quickly.
How to defeat Puppet-Devouring Green Monster in Lies of P: Pay attention to its body movements before each attack. Dodge or Perfect Guard its charges and sweeping strikes, then attack when it stops moving. Avoid using all your stamina during a single opening, as it can quickly launch another combo. Keep healing items ready for the second phase.
17. Robber Weasel (Optional)
- Type: Optional mini-boss
- Location: Krat Central Station Platform
- Rewards: Robber Weasel’s Hunting Apparel, Robber Weasel’s Mask

Robber Weasel is a human Stalker who uses a small axe and fast attacks. You encounter this enemy when revisiting Krat Central Station later in the game.
The fight is similar to other human encounters, but Robber Weasel’s quick movements can make it difficult to land heavy attacks. She can move into range quickly and punish you if you are still recovering from an attack.
How to defeat Robber Weasel in Lies of P: Focus on dodging and wait for her attack combinations to end before striking. You can attempt back attacks, but her speed makes positioning important. Keep your attacks short and leave enough stamina to avoid her next move.
18. Walker of Illusions (Optional)
- Type: Optional mini-boss
- Location: Collapsed Street
- Rewards: Legion Caliber, Dark Moon Moonstone of the Covenant
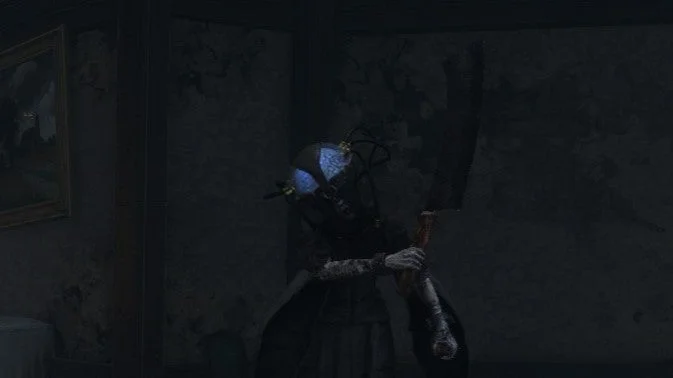
Walker of Illusions is a fast boss that uses a large blade and aggressive close-range attacks. The fight can be difficult because the boss moves quickly and does not leave many long openings.
During the fight, Walker of Illusions can create a copy of itself. This adds another enemy to the arena and makes it harder to track attacks. If you focus on the wrong target for too long, you can quickly become overwhelmed.
How to defeat it: Learn the timing of its attacks and use Perfect Guards when you can. When the clone appears, focus on dealing with the extra threat before returning to the main enemy. Avoid long attack combinations, and use the short recovery periods after its combos to deal damage.
19. Corrupted Parade Master
- Type: Main boss
- Location: Krat Central Station, during the return visit
- Rewards: Full Moonstone of the Covenant, Quartz

The Corrupted Parade Master is a changed version of the first major Lies of P boss. It retains many of the original Parade Master’s physical attacks but adds dangerous Decay effects and altered movements.
Because you have already fought the original boss, some of its attack patterns may feel familiar. However, the status effects make mistakes more costly, especially if you allow Decay to build up while taking repeated hits.
How to defeat it: Bring items that help remove or resist Decay. Watch for its lunges and heavy attacks, and avoid staying directly in front of it for too long. Attack after its combos rather than trying to interrupt every move. The fight is more manageable if you stay patient and keep your health under control.
20. Black Rabbit Brotherhood (Second Fight)
- Type: Main boss
- Location: Relic of Trismegistus Combat Field
- Rewards: Quartz
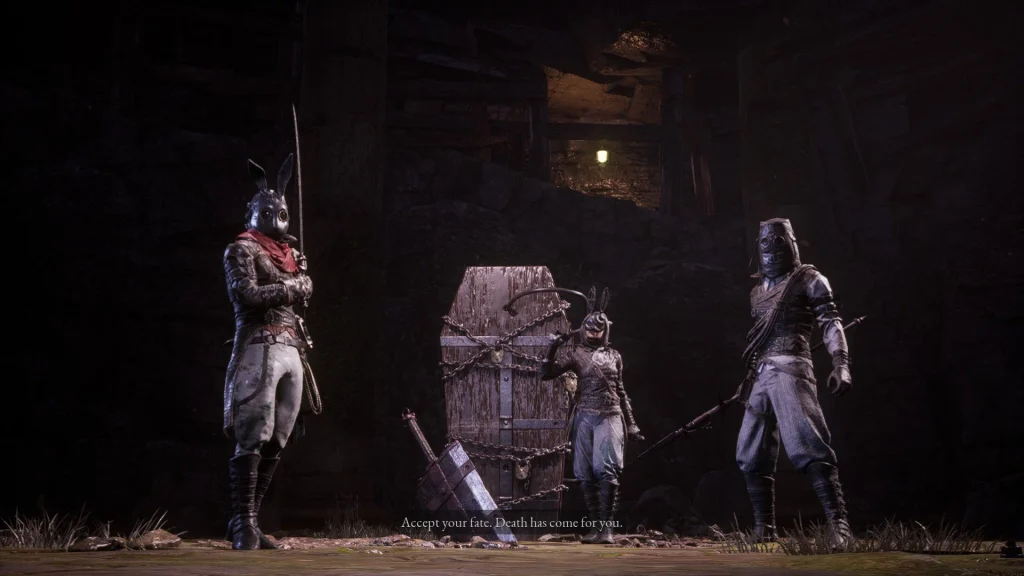
The second Black Rabbit Brotherhood fight brings back the surviving members of the group. Unlike the first encounter, you must deal with several opponents in a smaller arena, making it harder to find space to heal or recover stamina.
Each member has a different weapon and attack style. They do not all attack at the same time, but the fight becomes more difficult as additional members join. Once the other members are defeated, the Eldest returns for another phase.
How to defeat Black Rabbit Brotherhood: Focus on one opponent at a time and avoid getting surrounded. Watch for opportunities to attack a member after they finish a combo, then move away before another enemy joins in. Try to reduce the health of the remaining members evenly, so you do not have to fight the Eldest alongside a nearly full-health opponent.
21. Door Guardian
- Type: Mini-boss
- Location: Arche Abbey Entrance
- Rewards: High-Level Alchemist Badge

Door Guardian is a large enemy that protects the route into Arche Abbey. It has high durability and powerful attacks, so the fight can feel slow if you try to defeat it using ordinary hits alone.
The boss is particularly dangerous when it swings its weapon or uses heavy attacks that cover a wide area. However, the key to this fight is building up stagger rather than simply trying to reduce its health with repeated light attacks.
How to defeat it: Focus on avoiding its heavy attacks and target its vulnerable leg when safe. Build up stagger until it becomes vulnerable to a Fatal Attack. Use your strongest weapon and save stamina so you can retreat after each attack. Be patient, as rushing the fight can lead to unnecessary damage.
22. Black Cat (Optional)
- Type: Optional encounter
- Location: Arche Abbey Outer Wall
- Rewards: Black Cat’s Mask
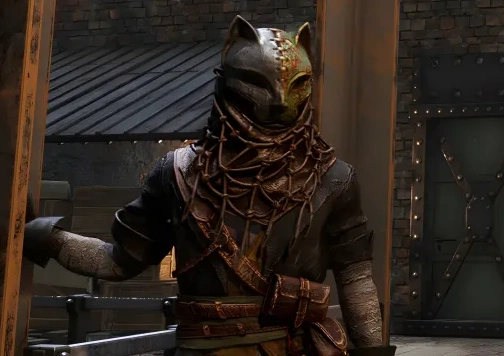
Black Cat is a human Stalker who can become hostile depending on your story choices. You can avoid the fight by agreeing to give him a Gold Coin Fruit when the relevant dialogue option becomes available.
If you choose to fight, Black Cat uses close-range attacks that are easier to manage than some of the later Lies of P bosses. However, you should still watch his movements and avoid attacking without checking for an opening.
How to defeat him: Use dodges or Perfect Guards to handle his weapon swings. Attack after he finishes a move, and avoid wasting stamina on missed heavy attacks. If you prefer to skip the encounter, choose the dialogue option that gives him the Gold Coin Fruit.
23. Laxasia the Complete
- Type: Main boss
- Location: Arche Abbey, Ascension Bridge
- Rewards: Sad Zealot’s Ergo
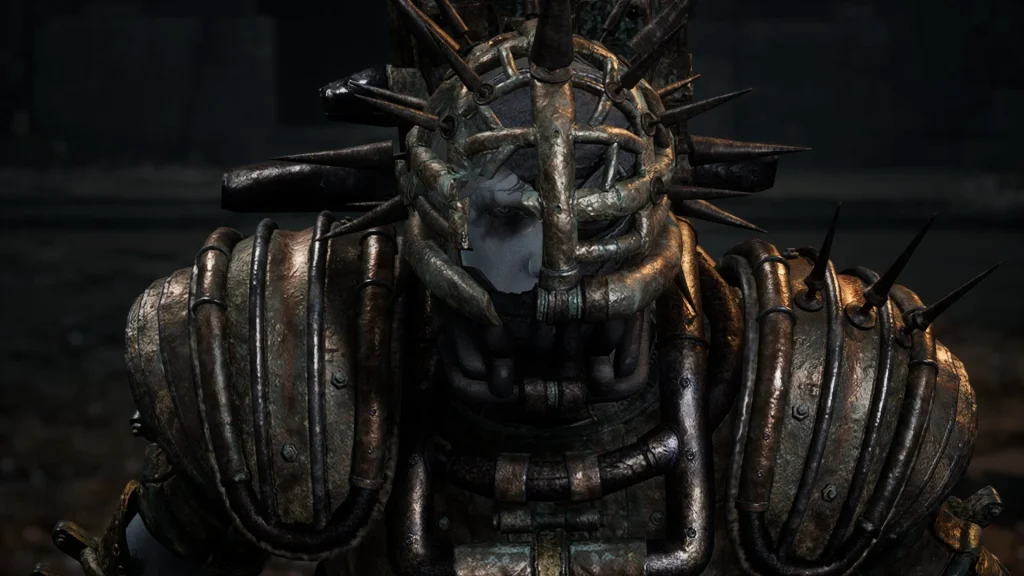
Laxasia the Complete is one of the most challenging bosses in Lies of P. She wears heavy armor, uses a large sword, and combines physical attacks with lightning-based abilities. Her attack combinations are long, and she can punish players who try to attack too often.
The fight has two phases. In the first phase, Laxasia uses heavy sword swings and charges. In the second phase, she becomes much faster and adds lightning attacks that cover more of the arena.
How to defeat her: Learn the timing of her sword combinations and use Perfect Guards when possible. During the second phase, watch for lightning projectiles and try to Perfect Guard them back toward her. Keep enough Pulse Cells for the second phase, and avoid using all your stamina while she is still attacking.
24. Red Fox (Optional)
- Type: Optional encounter
- Location: Arche Abbey Upper Area
- Rewards: Red Fox’s Mask

Red Fox is another human Stalker whose encounter depends on your earlier story choices. She uses quick weapon attacks and can move around you quickly, making it difficult to land heavy attacks.
The fight is similar to encounters against Robber Weasel and Owl Doctor. Red Fox relies on close-range pressure rather than the large-area attacks used by the main bosses in Lies of P. You can avoid fighting her if you meet the relevant dialogue and item conditions.
How to defeat Red Fox in Lies of P: Focus on dodging her combos and attacking after she finishes a sequence. Try to move behind her when possible, but do not chase her recklessly. Short attacks are safer than long combinations because she can quickly counterattack.
25. Simon Manus, Awakened God
- Type: Main boss
- Location: Arche Abbey, Cradle of the Gods
- Rewards: Fallen One’s Ergo

Simon Manus is one of the final main bosses in Lies of P. His first phase uses heavy attacks and large swings that can cover a wide area. In the second phase, he transforms into Awakened God and adds more dangerous attacks with greater range.
The fight tests your ability to manage stamina, recognize attack patterns, and find safe openings. Simon can punish you if you stay too close for too long or try to heal while he is preparing an attack.
How to defeat Simon Manus, Awakened God in Lies of P: Watch his animations carefully and move away from attacks that cover a large area. Avoid using all your stamina on offense, as you will need it to dodge his next move. Attack after he finishes a combo and use healing items when you have enough distance to do so safely.
26. Nameless Puppet (Secret ending boss)
- Type: Conditional final boss
- Location: Under the Abyss
- Rewards: Nameless Puppet’s Ergo

The Nameless Puppet is a secret final boss that you encounter if you refuse to give Geppetto your heart after defeating Simon Manus. If you agree to give up your heart, you will not fight this boss and will receive a different ending.
The Nameless Puppet is fast and aggressive, with two phases that require different approaches. Its first phase uses quick melee attacks that can be learned with practice. In the second phase, it becomes faster and more dangerous, chaining attacks together and giving you fewer opportunities to recover.
How to defeat Nameless Puppet in Lies of P: Learn the timing of its attacks and use a mix of Perfect Guards and dodges. Avoid relying only on heavy attacks, as the boss can quickly interrupt you. Save healing items for the second phase and attack during short recovery periods rather than trying to force long combos.
Lies of P Optional Bosses: Which Fights Can You Skip?
You do not need to fight every Lies of P boss to finish the main story. Some are hidden in side areas, while others depend on your dialogue choices. Optional encounters include:
- Survivor
- Puppet of the Future
- The Atoned
- White Lady
- Mad Clown Puppet
- Owl Doctor
- Robber Weasel
- Black Cat
- Red Fox
The final Lies of P boss, The Nameless Puppet, is also avoidable, but skipping it changes the ending you receive. Some encounters can be missed entirely depending on your decisions, so explore areas carefully if you want to collect every reward.
Lies of P Bosses Ranked by Difficulty
Any Lies of P boss’s difficulty depends on your weapon, build, upgrades, and how well you handle Perfect Guards. However, these fights are often among the most challenging in the base game.
| Difficulty | Bosses |
| Very hard | Laxasia the Complete, Nameless Puppet |
| Hard | Romeo, King of Puppets; Fallen Archbishop Andreus; Simon Manus |
| Moderate to hard | Scrapped Watchman; Eldest of the Black Rabbit Brotherhood; Puppet-Devouring Green Monster |
| Moderate | King’s Flame, Fuoco; Champion Victor; Corrupted Parade Master |
| Early-game challenge | Parade Master; Mad Donkey |
For more gaming news and guides, check out Driffle Blog.


